
woven felt pillow
I was delighted when Joelle and Page asked me to do a guest blog post for the Purl Bee. Every time I visit their shop, Purl Soho, I am drawn immediately to the beautiful wool felt so it was natural that I went there first for my inspiration. Not only are the colors beautiful, but it is a fantastic material to work with. Sewing is so much easier and less time consuming when you don't have to worry about finishing every edge and seam!
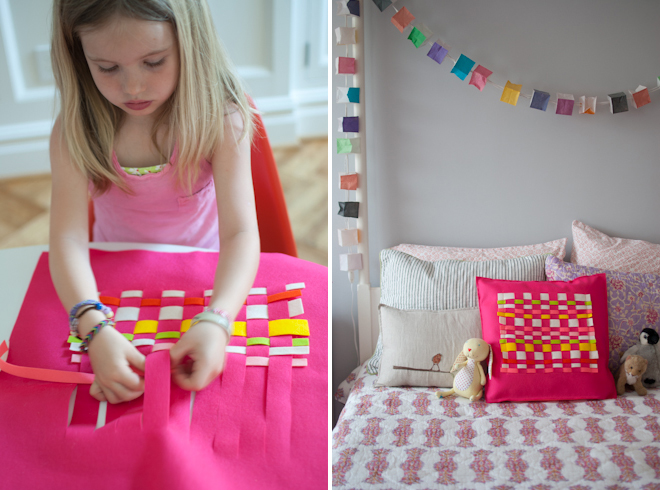
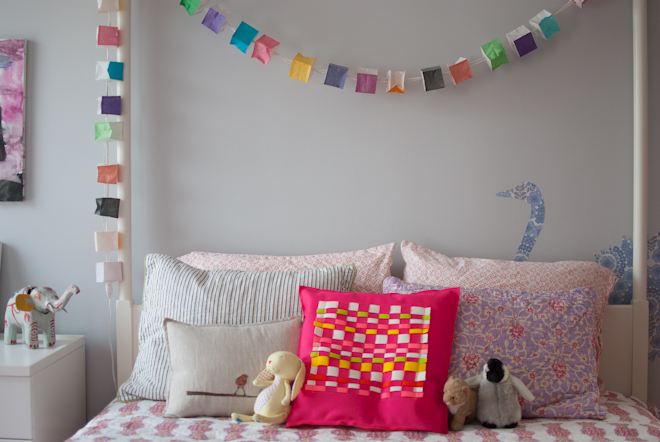
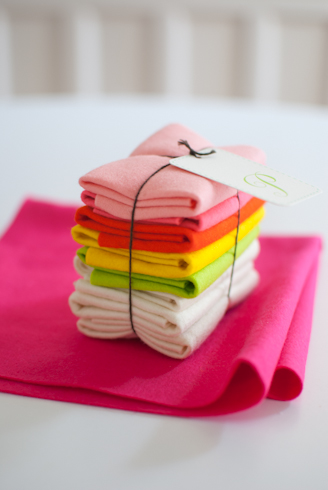 Bea absolutely loves doing art and craft projects and has been very jealous this year of the weaving classes her brothers have taken. I decided a woven pillow would be a great use of the felt, and she could be my partner in the project. I bought two 18" squares of fuschia wool felt, one 18" square of bright pink felt, and a felt bundle in "spring" to make our pillow. Bea loved all the colors, and we both agreed that this would be a pretty pillow for her room.
One thing I have learned about crafting with my kids is that if I care a lot about what the finished project is going to look like I have to be pretty careful in the planning stage. I find it very beneficial to work with them one on one when I can, which is a lot less chaotic than trying to manage all three of them, and has the added benefit of special time together. In this case I did not want to waste the gorgeous felt so that meant doling out the colors carefully. While Bea was in school I did the prep work. First I used a chalk pencil to draw a 12-inch square 3 inches inside the perimeter of one of the 18-inch square pieces of fuscia felt. I measured and marked lines 1 inch apart within the 12 inch square. Leaving the outer lines in tact, I used a rotary cutter to carefully slit the felt on the remaining 10 lines. These slits created the warp for our weaving.
As I mentioned, I wanted to be careful with the color planning. My vision for the pillow was primarily pink and white, using the lime green, yellow, and orange as accent colors. I also didn't want to waste the felt by cutting up too many extra strips! As a result, I cut the following from the felt bundle:
white: three 1" strips and seven 1/2" strips
dark pink: four 1/2" strips
light pink: three 1/2" strips
yellow: two 1" strips and one 1/2" strip
orange: three 1/2" strips
lime green: two 1/2" strips
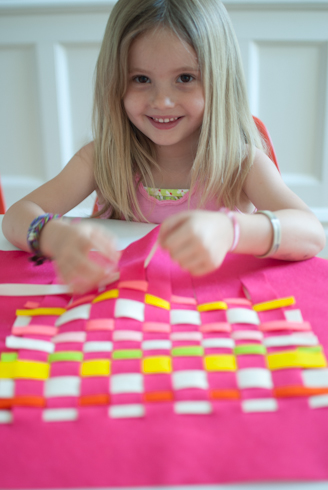
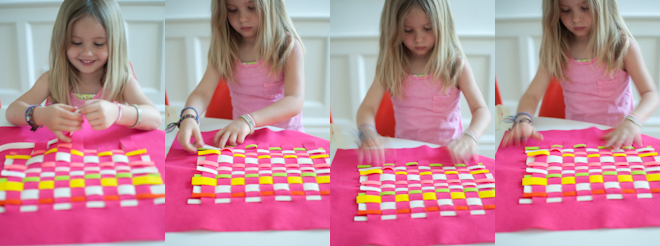
This assortment gave plenty of strips for Bea to work with and she still had the feeling she had lots of choices. She loved carefully weaving the strips in and out and creating the pattern, and I love the end result. She was really able to do this part on her own but I sat with her and helped her tighten the strips as she worked so the weaving would not have any big gaps between the strips.
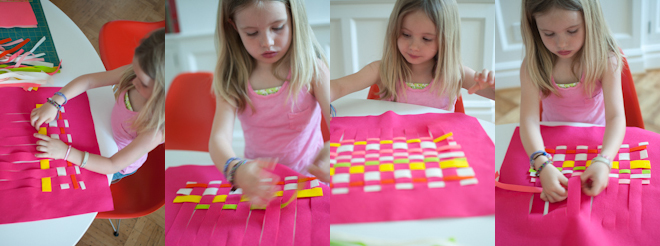
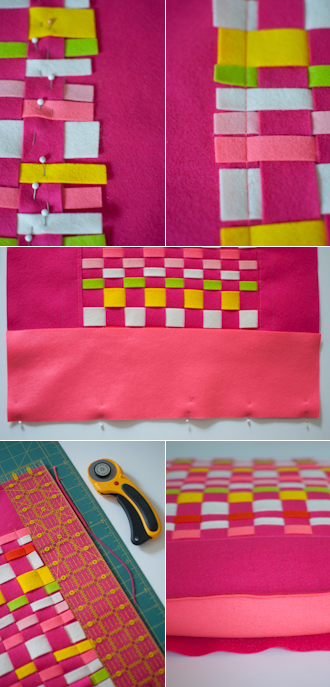
Once Bea was done weaving I pinned the strips together at the sides (see photo far left top) to secure the strips to each other. I sewed the strips to the square (alignining the left edge of my presser foot with the last slit) to secure the weaving in place (see photo left top). I also sewed across the top and bottom of the woven square, parallel to the strips, crossing the stitching at the corners to match the style of the weaving.
Look at your weaving and see if you like it best oriented a certain way so you can decide which side is the bottom. Next cut a 6 inch strip from the 18" square of bright pink felt and pin it to the backside of the weaving along the bottom edge (photo middle left). Sew along this edge with a 3/8" seam allowance. Next pin the remaining 18" square of fuschia felt to the back of the pillow square, lining up the edges as carefully as you can. Sew around three remaining edges, leaving the bottom edge open. Place the pillow case on a cutting mat and use a rotary cutter to trim edges slightly. Stuff with pillow insert tucking corners into the flap to completely enclose the pillow.
 ACTIVITIES
Reader Comments (6)
Great tutorial! The colourful cubes are very pretty too. Are they handmade?
Found your blog today. Love your projects and activities with kids. And your food leaves me hungry :) !!
Those are so pretty and the colors are so fun! I just clicked over from The Purl Bee. I would LOVE to link to your tutorial if you didn't mind! Off to explore the rest of your blog...
Thanks! Glenys, the colorful cubes are actually a string of lights I bought at a shop called Pomme in Brooklyn.
Rachel, please feel free to link to my tutorial...happy you like it! Amy
What a fun idea! Your daughter looks so proud of herself in those pics, I love seeing that look on my kids' faces when they craft! Thanks so much for sharing!
Beautiful! I can't wait to try it with my 7-year-old, who loves weaving with paper. I love the Indian block-print bedspread, where did it come from?