
balloon weights
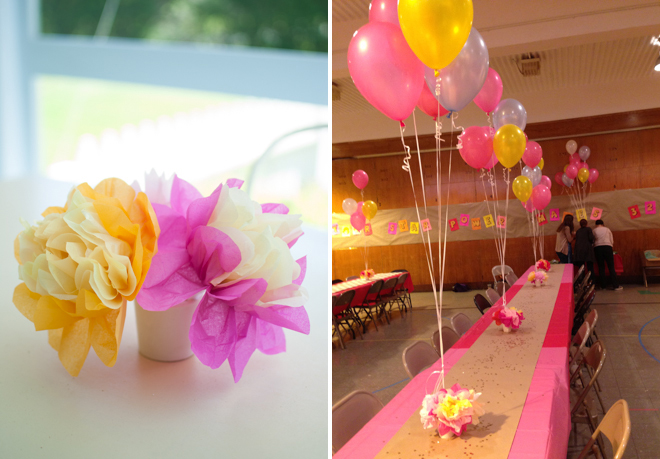
This year my friend Emma asked me if I would work on decorations with her for our school's Staff Appreciation Day. We had fun trying to come up with ways to make our very institutional looking gym get tranformed in to something pretty and festive. We started by coming up with a palette, and decided balloons would give some needed height since the gym has such high ceilings. We needed balloon weights to keep the centerpieces in place and realized that was a perfect opportunity to add a fun homemade element that would keep it looking fresh and fun. We ordered 20 hot pink, 20 light pink, 20 yellow, 20 blue, and 10 white balloons and just mixed them up sort of randomly into groups of 5. Aside from the fact that the hot pink and light pink looked identical once they were inflated it worked out well. Emma made a banner by painting our message with gold paint onto some brightly colored paper.
I decided plaster of paris might be a cool material to use for our weights. At first I was envsioning all white sculptures realized that was too tricky - especially since I needed about 20 weights and didn't have any experience making anything like that. I decided to just use basic paper cups for molds. I needed two things - a loop to tie the balloon strings to, and some way to make them more festive and interesting looking. A jumbo paperclip worked perfectly for the loop and I have fond childhood memories of making simple tissue paper flowers so thought I might recruit the kids to help with that. I twisted clusters of three white pipe cleaners together and hooked the paper clips onto colored pencils. I positioned these things in the cups and started pouring plaster on top of them only to realize I had the order backwards. The best way would be to have everything ready, mix up a batch of plaster of paris and fill about 18 cups. Then, working quickly, we drop a pipe cleaner bundle into each cup and suspend the paperclips in the plaster by balancing the pencils across the tops of the cups. Let the plaster set overnight.
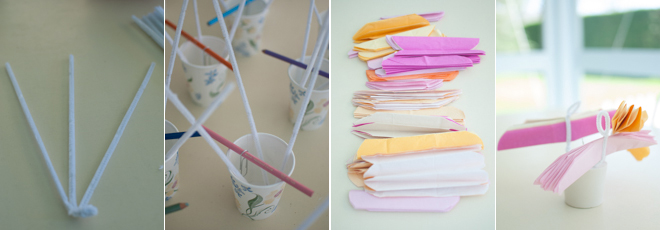
To finish the flowers I cut tissue paper into squares measuring roughly 5-6 inches. I used a few shades of pink and some yellow. Once all the squares were cut I made stacks (with some color variations in each stack) that were around 6 sheets each. They don't need to be exact...the more layers you have the fuller your flowers will be, but if they get too thick it is hard to separate all the petals. Fold each stack into accordian pleats so that when it is all folded it is about 1 inch wide. Trim the ends to create rounded or pointed petals. Fold a pipe cleaner around the center of each bundle of tissue, making sure that the pipe cleaner stem is not too long -- you can trim them or just fold them to be short -- so that your flowers are close to the plaster and don't droop too low. Open up the folds of the paper fanning it around around the pipe cleaner and then carefully peel up the tissue, one layer at a time. It may rip a little but not to worry...they do not need to be perfect! Although I planned to recruit the kids for this stage Emma and I sat and enjoyed a glass of wine while assembling the flowers and got through the job fairly quickly.
I left the paper cups on my molds until I was ready to use them. At that point I just cut a little slit in the rim of the cup and tore it off, revealing the nice clean plaster. When the luncheon was over we packed them all up to reuse in the future. I'm sure we will need to re-fluff the flowers a bit, or even remake a few, but the weights worked so well I am sure we can use them again.
 1 Comment
Reader Comments (1)