Entries in crafts (5)

Monday
Oct032011

sheep and wool festival


Last year I had the pleasure of going to the Rhinebeck Sheep and Wool Festival for the first time. I had heard about it from various yarn loving friends over the years, so when I heard that my dear friend Page and her Purl Soho partner Joelle Hoverson were going (Joelle was doing a book signing for her book More Last Minute Knitted Gifts) I asked if I could join them. 


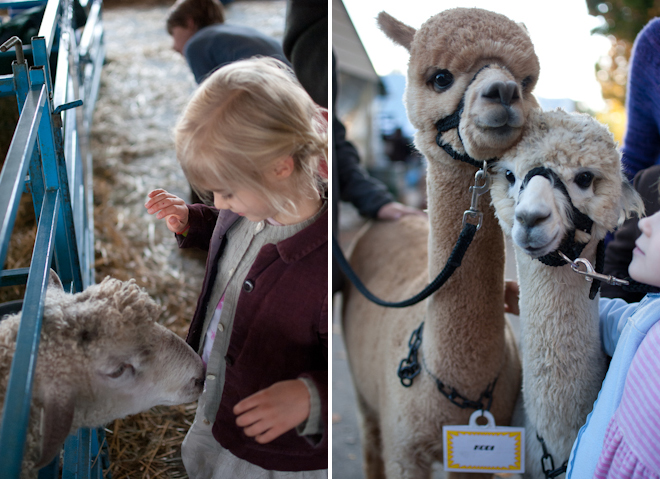
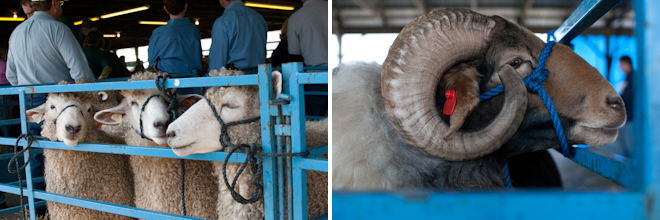
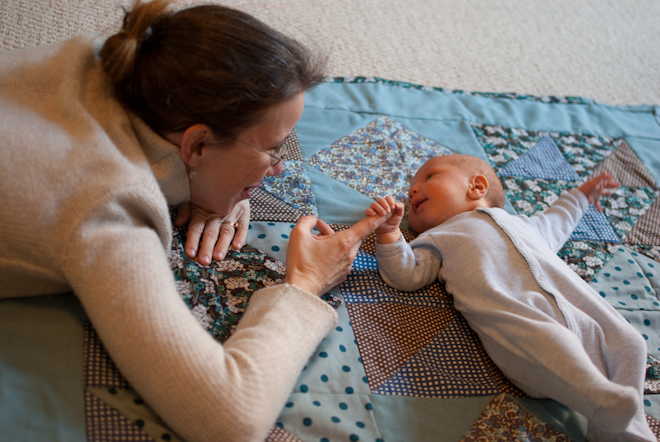
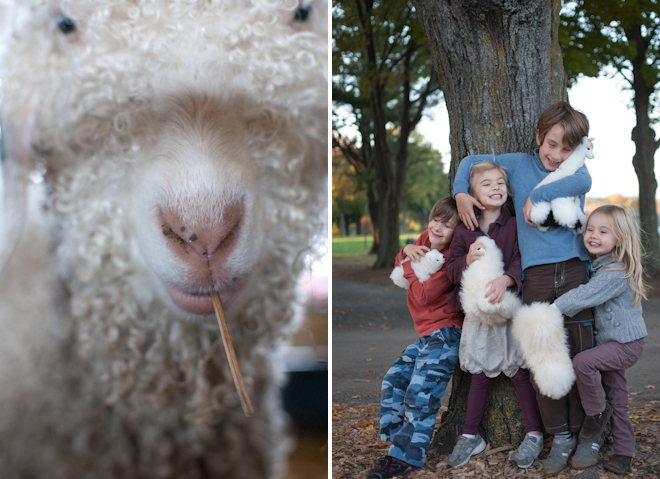
In the end Page and I decided to bring our families, and although I felt like I was asking Adam and the kids to tag along on something that was clearly all about me, we all had a fantastic time. We started out admiring the sheep, goats, and alpacas -- they have such whimsical faces that I could have taken a hundred photos. Then, while Page and Joelle and I spent way too much time pouring over all the beautiful wool in all its various forms, the kids and dads got to sample lots of sweet treats, listen to music, and play games. They even went to an airshow at the nearby Old Rhinebeck Aerodrome. At the end of the day we found the amazing animals created from fleece that the kids are holding in the photo at the top of this post. They are their favorite stuffed animals to this day, and have already asked if they can each choose another this year.


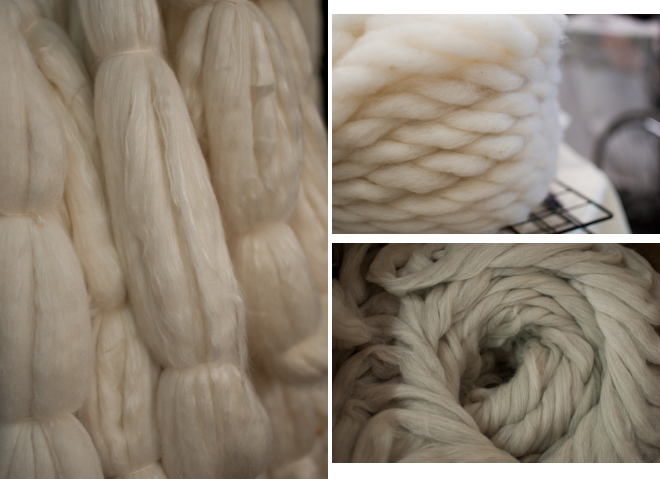
The photos above are just a few of the many things I could not resist buying. The photo on the left is skeins of wool roving...I had admired one just like it hanging from a knob in the living room at Page's house before we went to the festival and was so happy to find it and copy her!  The photo on the top right is more roving, just presented differently. The pale grey spiral on the bottom right is actually an enormous bag full of carefully combed roving that I plan to crochet into a rug...we will see when I actually get to that project. I am slightly terrified of ruining it!


I think this may be an annual tradition for Page and me and our families...I know we will be going back this year on October 15th...my kids have been asking about it since June. It is a great way to get out of the city on a beautiful fall day. All the details of the festival can be found here.

Sunday
Mar202011

painted guitars


Every time I am at my friend Jodi's house I admire these super cute child sized guitars...and Jodi says her boys play with them all the time!  The yellow one was made by her oldest son in school. The blue one was made by talented friends for her second son. I'll have to ask for a rock concert the next time I visit!

Sunday
Mar202011

baby quilt 


Before my nephew was born, in January, I knew I wanted to make him a special gift. I decided on a small quilt -- the kind you can throw on the floor for them to play on during their first year, and then use as a crib blanket when they are old enough to have one. 


I was reading The Purl Bee and was inspired by the play of triangles in these coasters. After reading the how to I decided to go ahead and use some triangle motifs in a palette of blues and browns. Once my squares were made I had a lot of fun rearranging them into as many patterns as I could come up with. In the end I decided to go with this:


The next step was to sew all the squares together.  I decided that since some of my larger squares were a pinwheel design that my best bet was to sew the 9 larger squares next. This way I would be sure that the points in the center would all line up. 


Once these squares were sewn I rearranged them a couple more times to be sure that I had the best arrangement. Once I was sure I went ahead and sewed them together - first making 3 columns, and then sewing the columns together to make the large square.


Next I cut long strips of the solid blue fabric to make the border. Once the top is completed it is time to layer the it with a layer of batting and a square of fabric for the back. This is always my least favorite part of making a quilt since getting all the layers smooth before you pin them together is really crucial. 


Once the layers are pinned together thoroughly you sew them together -- I started by sewing from the center out towards the edges, working in all directions. This helps to prevent the layers from shifting which can result in unatractive puckering along the seams. After the layers are sewn together you need to trim the entire thing to be square (or square the sides even if the quilt is a rectangle). After trimming the edges I went back in to each square and sewed along all the seams...this is called the "stitch in the ditch" method.  


The last step is to make a binding for the quilt. My friend Joelle's book, Last-Minute Patchwork + Quilted Gifts, has a tutorial for how to make the binding that I refer to everytime I make a quilt. Many people dread this part of quilt making but I love it -- it transforms the sometimes still slightly messy looking project into a very finished peice. And there is something about that little bit of hand sewing that I really love.


Thursday
Mar172011

cardboard castle


I am a huge fan of Ann Wood and have one of her small birds in my collection. Recently I was looking at her blog and discovered the most stunning cardboard castle. I knew I could never rival her artistry, but thought I could have fun trying to create a castle with my kids…the kids wholeheartedly agreed!

Being a bit of a control freak I had to do a little deep breathing as my kids tore into the supplies and immediately wanted to (gasp) color on the cardboard with magic markers! Once I recovered, and calmly encouraged them to think about a more purist approach, we agreed on a compromise: we could all glue things to the large castle but would try to keep it marker free…then the boys each did a smaller building that they got to art direct all on their own.


I love the final results and we spent 2 whole afternoons working on the project. By the way, this in one idea that really benefits from a glue gun--you avoid the messy drips of regular white glue and the hot glue sets quickly so you do not have to hold it for a long time at all to get it to stick. The kids think the glue gun is an exciting power tool but do be careful…it is really really hot so little kids probably should not touch it at all.


Thursday
Mar172011

"felties"


A few days before halloween I stopped by our local fabric store to get some costume making supplies. My kids were with me and my son Oliver begged me to buy the book Felties. Of course, we had no time to be making little dolls with three kids in need of costumes, so the book got buried in one of the piles in my work room. During the kids school holiday Oliver found the book and started begging me to sew with him. I let each child pick one idea from the book - Oliver chose the Panda, Owen chose the Samurai, and Bea chose the Polar Bear (most likely because it had a baby). I realized quickly that helping all three at the same time would prove challenging so I scanned the pages for each project and printed them out. As I was trying to figure out the best way for the kids to copy the patterns I remembered my friend Jodi's story on applique in Martha Stewart Kids…she suggests freezer paper as a tool in that story and sure enough, it was the perfect solution here too. The kids could easily trace the patterns onto the freezer paper and then we ironed the freezer paper to the felt. It sticks so you can cut along the lines of the paper--then you just peel the paper off the felt and you have perfectly cut pieces. The boys managed to do much of this on their own once I helped get it organized. Bea's role was more spectator than anything else but she seemed perfectly happy nonetheless. Although I have tons of embroidery floss that I have collected over the years (while never actually learning to embroider) I did not have any that matched our felt. We found that plain old thread worked just fine. We made a few other adjustments along the way too…the pieces that were meant to be glued did not seem secure enough so we sewed a few stitches through them too. We also ran out of steam before making the baby polar bear but luckily Bea was ok with that too. Oliver was the most committed to the project…once his panda was done he asked for a few more scraps of felt and whipped up a little basket of leaves for him to eat too! All in all, it was a great way to spend half a day inside on a very cold day!